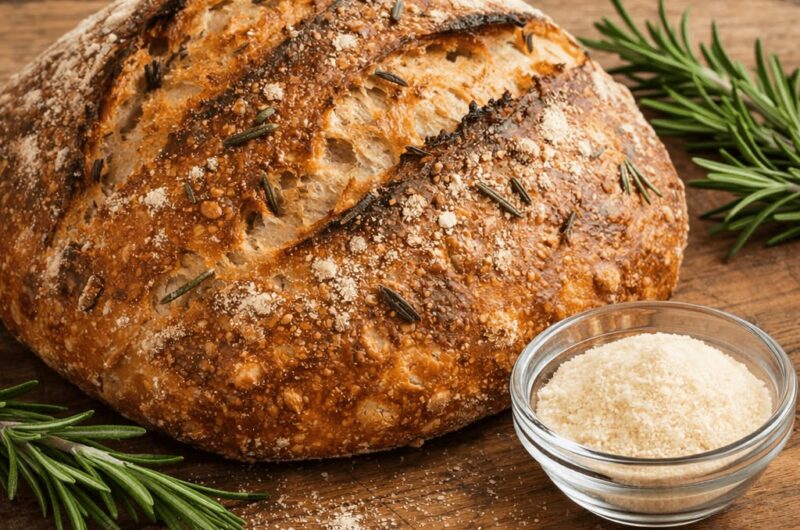
There is something wonderfully comforting about homemade sourdough bread, especially when it is infused with fragrant rosemary and roasted garlic. This Rosemary and Garlic Sourdough Loaf combines a crisp, beautifully browned crust with a soft, chewy interior filled with savory garlic and fresh herb flavor. It is delicious served warm with butter, alongside soup, or sliced for sandwiches.
This recipe uses a traditional sourdough fermentation process. Although the dough needs time to rise, most of that time is hands-off. The long fermentation develops the bread’s characteristic tangy flavor while creating a light, airy crumb.
Ingredients
For the Dough
- 100 g active sourdough starter
- 350 g lukewarm water
- 500 g bread flour
- 10 g fine sea salt
- 1 tablespoon olive oil, optional
- 1–2 tablespoons fresh rosemary, finely chopped
- 4–6 cloves roasted garlic, mashed or finely chopped
For the Garlic
- 1 whole garlic bulb
- 1 teaspoon olive oil
- A small pinch of salt
Equipment
You will need a large mixing bowl, kitchen scale, dough scraper, clean kitchen towel, banneton or lined bowl, parchment paper, razor or sharp knife, and a Dutch oven with a lid.
Step 1: Prepare the Roasted Garlic
Roasted garlic gives this sourdough a sweeter, deeper flavor than raw garlic.
Preheat your oven to 200°C (400°F). Slice the top from a whole garlic bulb to expose the cloves. Drizzle lightly with olive oil and sprinkle with a small pinch of salt. Wrap the bulb loosely in foil and roast for approximately 35–45 minutes, or until the cloves are soft, golden, and easily squeezed from their skins.
Allow the garlic to cool completely. Squeeze the roasted cloves from their skins and mash them gently with a fork.
You can prepare the garlic several hours ahead or even the day before baking. Chilled roasted garlic is easier to incorporate into the dough without making it excessively sticky.
Step 2: Mix the Dough
Place the active sourdough starter in a large bowl and add the lukewarm water. Stir until the starter is mostly dissolved.
Add the bread flour and mix until no dry patches remain. The dough will look rough and shaggy at this stage. Cover the bowl and let it rest for approximately 30 minutes.
This resting period, often called an autolyse when performed before adding salt and starter, allows the flour to absorb the water and helps develop gluten.
After the rest, add the salt and optional olive oil. Use your hands to gently squeeze and fold the dough until everything is evenly incorporated.
Step 3: Add Rosemary and Garlic
Add the chopped rosemary and cooled roasted garlic.
Gently fold the ingredients into the dough. Avoid aggressively kneading because you want to preserve the developing structure of the dough.
The garlic may make the dough slightly softer, but it should become easier to handle as fermentation progresses.
For the best flavor, use fresh rosemary rather than dried whenever possible. Finely chop the rosemary so that it distributes evenly throughout the loaf.
Step 4: Bulk Fermentation
Cover the bowl and let the dough ferment at room temperature.
During the first two hours, perform a series of stretch-and-folds. Every 30 minutes, gently pull one side of the dough upward and fold it toward the center. Rotate the bowl and repeat on all four sides.
Aim for approximately 3–4 sets of folds.
As fermentation continues, the dough should become smoother, stronger, and more elastic. Depending on the temperature of your kitchen and the strength of your starter, bulk fermentation may take approximately 4–8 hours.
Rather than relying only on the clock, watch the dough. It should become noticeably puffy, develop bubbles, and increase in volume.
Avoid allowing it to ferment too long. An over-fermented dough can become weak and difficult to shape.
Step 5: Shape the Loaf
Lightly flour your work surface and gently turn the dough onto it.
Avoid pressing all the air out. Fold the dough toward the center and then gently shape it into a round boule by creating surface tension.
Use a dough scraper to help rotate the loaf while gently pulling it toward you across the work surface.
When the dough feels firm and holds its shape, place it seam-side up into a well-floured banneton or a bowl lined with a floured kitchen towel.
Step 6: Cold Proof
Cover the shaped dough and place it in the refrigerator for approximately 8–16 hours.
Cold fermentation is one of the easiest ways to develop additional flavor while making the dough easier to score and bake.
The next day, the loaf should feel firm and slightly expanded. If it has dramatically doubled or appears very fragile, it may have fermented too far.
Step 7: Preheat the Oven
Place a Dutch oven with its lid inside your oven and preheat to 230°C (450°F) for at least 30–45 minutes.
A properly heated Dutch oven helps create the steam needed for a crisp crust and good oven spring.
When ready to bake, carefully remove the hot Dutch oven.
Step 8: Score the Bread
Place a sheet of parchment paper on your work surface and carefully turn the cold dough onto it.
Dust the surface lightly with flour if desired.
Using a bread lame or very sharp knife, make one confident slash across the top of the loaf. You can also create a simple decorative pattern, but one deep main score is important because it gives the bread room to expand during baking.
Carefully transfer the dough into the preheated Dutch oven.
Step 9: Bake
Cover the Dutch oven and bake at 230°C (450°F) for approximately 20 minutes.
Remove the lid and continue baking for another 20–25 minutes, or until the loaf is deeply golden brown.
For an especially crisp crust, allow the bread to bake uncovered for a few additional minutes if necessary.
The finished loaf should sound hollow when tapped underneath and should have a firm, richly browned crust.
Step 10: Cool Completely
This step is important.
Remove the loaf from the Dutch oven and place it on a wire rack. Allow it to cool for at least 1–2 hours before slicing.
Although the aroma of warm garlic and rosemary will make it tempting to cut immediately, the crumb continues setting as the bread cools. Cutting too early can result in a gummy interior.
Once cooled, slice with a serrated bread knife.
Helpful Tips for Perfect Sourdough
Use an active starter. Your starter should be bubbly and lively before you begin. A weak starter may produce a dense loaf.
Don’t add hot garlic. Roasted garlic should cool completely before going into the dough.
Watch the dough, not just the clock. Fermentation depends heavily on room temperature, starter strength, flour, and hydration.
Don’t overload the loaf with garlic. Too much garlic can make the dough difficult to handle and can overpower the rosemary.
Use fresh rosemary. Its bright herbal flavor pairs beautifully with sweet roasted garlic.
Keep your Dutch oven hot. A thoroughly preheated pot gives the loaf the strong initial heat needed for good oven spring.
Serving Ideas
This bread is wonderful simply sliced and spread with salted butter. For an extra-special appetizer, toast slices and drizzle them with olive oil.
Serve it alongside tomato soup, creamy potato soup, vegetable soup, pasta, roasted chicken, or a hearty stew. It also makes excellent grilled cheese sandwiches.
For breakfast, toast a slice and top it with scrambled eggs, avocado, or a poached egg. The savory rosemary and garlic flavors work especially well with eggs.
You can also cut the loaf into cubes and use them to make homemade croutons. Toss the cubes with olive oil and bake until crisp and golden.