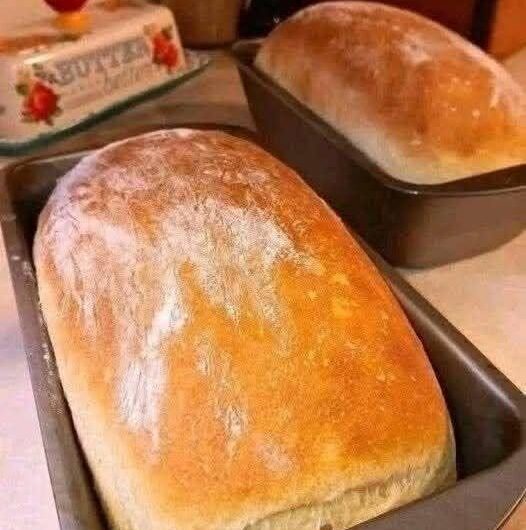
If you are looking for a homemade bread recipe that is simple, affordable, and requires almost no effort, this No-Knead, No-Egg, No-Butter Bread is a perfect choice. You do not need a stand mixer, special equipment, or complicated baking techniques. There is no kneading, no eggs, and no butter. Just mix the ingredients, let the dough rise, shape it gently, and bake.
The result is a beautifully rustic loaf with a crisp golden crust and a soft, tender interior. It is delicious served warm with soup, used for sandwiches, or simply sliced and enjoyed with jam, honey, or olive oil.
Ingredients
- 3 cups all-purpose flour
- 1 ½ teaspoons salt
- 1 teaspoon instant yeast
- 1 ½ cups warm water
- 1 tablespoon olive oil
- 1 teaspoon sugar or honey
- Extra flour, for shaping
- Optional: sesame seeds, sunflower seeds, or dried herbs for topping
Equipment
You will need:
- A large mixing bowl
- Wooden spoon or spatula
- Clean kitchen towel or plastic wrap
- Dutch oven or heavy oven-safe pot with a lid
- Parchment paper
- Wire cooling rack
Step 1: Prepare the Dough
Begin by adding the flour, salt, instant yeast, and sugar to a large mixing bowl. Stir the dry ingredients together until evenly combined.
Pour in the warm water and olive oil. Using a wooden spoon or spatula, mix everything together until there are no large patches of dry flour remaining.
The dough will look wet, sticky, and somewhat rough. This is exactly what you want. Do not add lots of extra flour and do not knead it. A wet dough helps create a light and airy loaf.
If the dough seems extremely dry, add another tablespoon or two of water. If it seems unusually runny, sprinkle in a small amount of flour. Different brands of flour absorb water differently, so small adjustments may be necessary.
Step 2: Let the Dough Rise
Cover the bowl tightly with plastic wrap or a clean kitchen towel.
Place the bowl somewhere warm and draft-free. Let the dough rise for approximately 2 to 3 hours, or until it has noticeably increased in size and looks bubbly on the surface.
The exact rising time depends on the temperature of your kitchen. On a warm day, the dough may rise quickly. In a cooler kitchen, it can take longer.
For even more flavor, you can place the covered dough in the refrigerator and let it rise slowly overnight. The next day, allow it to sit at room temperature for about 30 to 60 minutes before shaping.
Step 3: Prepare the Oven
About 30 minutes before baking, place your Dutch oven or heavy oven-safe pot with its lid inside the oven.
Preheat the oven to 450°F (230°C).
Heating the pot before adding the dough helps create the intense heat needed for a crisp crust and excellent oven spring.
Be extremely careful when handling the hot pot. Use thick oven mitts because both the pot and lid will become extremely hot.
Step 4: Shape the Dough
Once the dough has finished its first rise, lightly flour your work surface.
Gently scrape the dough from the bowl onto the floured surface. Try not to deflate it too much because those bubbles contribute to the bread’s airy texture.
Lightly flour your hands and gently shape the dough into a round or oval loaf. You do not need to knead it.
If the dough is very sticky, use a little extra flour on your hands. Avoid adding excessive flour because this can make the finished bread heavy.
Place a sheet of parchment paper on your counter and transfer the shaped dough onto it.
If desired, sprinkle the top with sesame seeds, sunflower seeds, dried rosemary, or another favorite topping.
For a traditional bakery-style appearance, use a sharp knife to make one or two shallow cuts across the top of the dough.
Step 5: Bake the Bread
Carefully remove the preheated Dutch oven from the oven.
Lift the parchment paper and dough together and place them into the hot pot.
Cover the pot with its lid and immediately return it to the oven.
Bake covered for 30 minutes.
The covered environment traps steam around the dough. This helps the loaf rise and produces a thin, crisp crust.
After 30 minutes, carefully remove the lid.
Continue baking uncovered for another 10 to 15 minutes, or until the bread becomes deep golden brown.
If you prefer a lighter crust, remove it closer to 10 minutes. For a darker, crunchier crust, continue toward 15 minutes.
Step 6: Cool Before Slicing
Remove the finished loaf from the Dutch oven and transfer it to a wire rack.
Although it may be tempting to cut into the bread immediately, allow it to cool for at least 30 to 45 minutes.
Cooling allows the interior crumb to finish setting. Cutting the bread too early can make the center appear gummy.
Once cooled, slice it with a serrated bread knife and enjoy.
Helpful Tips for Success
Use warm, not hot, water. Water that is too hot can damage the yeast. Aim for comfortably warm water rather than boiling or very hot water.
Don’t over-flour the dough. Sticky dough is normal for no-knead bread. Too much flour can result in a dense loaf.
Give the dough enough time to rise. The dough should become noticeably larger and bubbly. If your kitchen is cold, allow additional rising time.
Preheat the pot. A properly heated Dutch oven helps produce a crisp crust and encourages the bread to rise dramatically during baking.
Don’t skip the cooling period. The bread continues to develop its texture as it cools.
Variations
This basic bread can easily be customized.
For a garlic-herb loaf, mix in 1 teaspoon of garlic powder and 1 to 2 teaspoons of dried Italian herbs.
For a seed-covered loaf, sprinkle sesame, pumpkin, sunflower, or flax seeds over the top before baking.
For a rustic whole-grain version, replace up to 1 cup of the all-purpose flour with whole-wheat flour. You may need a little additional water because whole-wheat flour absorbs more liquid.
For a cheesy loaf, add a small handful of shredded cheese and some dried herbs to the dough.
You can also add chopped olives, roasted garlic, or finely chopped sun-dried tomatoes for a savory variation.
How to Store the Bread
Store the cooled bread in a paper bag or loosely wrapped kitchen towel at room temperature for up to two days.
Avoid storing freshly baked bread in the refrigerator unless necessary, because refrigeration can make bread stale more quickly.
For longer storage, slice the loaf and place the slices in a freezer-safe bag. Freeze for up to three months. Individual slices can be warmed directly in a toaster or oven.
Serving Ideas
This homemade bread is incredibly versatile. Serve thick slices alongside vegetable soup, tomato soup, chili, or stew.
It also makes excellent toast. Add jam and honey for breakfast, or top it with avocado, tomatoes, or roasted vegetables for a simple lunch.
For dinner, brush slices lightly with olive oil and toast them until crisp. You can also use the bread to make sandwiches, grilled cheese, or garlic toast.