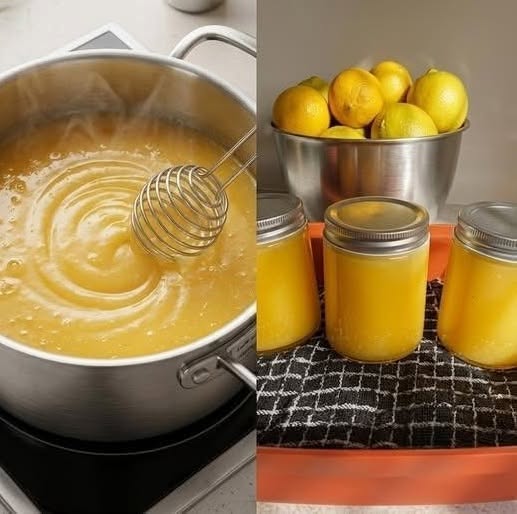
Lemon curd is a silky, bright, sweet-tart spread made with fresh lemons, egg yolks, sugar, and butter. It is wonderfully versatile and can be used on toast, pancakes, waffles, scones, cakes, cupcakes, cookies, tarts, or layered desserts. Homemade lemon curd has a much fresher flavor and smoother texture than most store-bought versions, and it is surprisingly easy to prepare.
The key to perfect lemon curd is gentle cooking. The mixture should become thick and creamy without overheating the eggs. Fresh lemon zest and juice provide the characteristic citrus flavor, while butter gives the finished curd its luxurious texture.
Ingredients
- 4 large egg yolks
- ¾ cup granulated sugar
- ½ cup freshly squeezed lemon juice
- 1 tablespoon finely grated lemon zest
- ½ cup unsalted butter, cut into small pieces
- 1 teaspoon vanilla extract, optional
- Pinch of salt
Equipment
- Medium heatproof bowl
- Whisk
- Medium saucepan
- Fine-mesh strainer
- Rubber spatula
- Clean glass jar or airtight container
Step 1: Prepare the Lemons
Wash and dry the lemons thoroughly.
Using a fine grater or microplane, grate the yellow outer peel of the lemons. Avoid grating deeply into the white pith because it can add bitterness.
You need approximately 1 tablespoon of finely grated zest for this recipe.
Next, cut the lemons in half and squeeze them. Strain the juice through a fine-mesh strainer to remove seeds and large pieces of pulp.
Freshly squeezed lemon juice gives the curd its best flavor. Bottled lemon juice can be more acidic or have a less fresh taste, so fresh lemons are strongly recommended.
Step 2: Combine the Eggs and Sugar
Place the egg yolks in a medium heatproof bowl.
Add the granulated sugar and whisk continuously for about 1–2 minutes. The mixture should become smooth and slightly lighter in color.
Add the lemon zest and lemon juice.
Whisk everything together until well combined.
Do not worry if the mixture looks thin at this stage. The curd thickens during cooking as the egg proteins gently set.
Step 3: Cook the Lemon Mixture
Pour the mixture into a medium saucepan.
Place the saucepan over low to medium-low heat.
Cook gently while stirring constantly with a rubber spatula or whisk. Make sure you scrape the bottom and corners of the saucepan regularly.
The goal is to gradually thicken the mixture without scrambling the eggs.
Continue cooking for approximately 8–12 minutes.
The exact time depends on the size and material of your saucepan and the temperature of your stove.
The lemon curd is ready when it coats the back of a spoon and leaves a clean path when you run your finger through it.
For an especially reliable result, use a kitchen thermometer. The curd should reach approximately 170–175°F (77–79°C).
Avoid allowing it to boil.
Step 4: Add the Butter
Remove the saucepan from the heat.
Add the butter pieces one at a time, stirring after each addition.
The residual heat will melt the butter into the warm lemon mixture.
Continue stirring until the butter is completely melted and the curd looks smooth, glossy, and creamy.
Add the vanilla extract, if using, along with a small pinch of salt.
The salt helps balance the sweetness and makes the lemon flavor taste brighter.
Step 5: Strain the Curd
Place a fine-mesh strainer over a clean bowl.
Pour the warm lemon curd through the strainer.
Use a rubber spatula to gently press the mixture through the strainer.
This step removes any small pieces of cooked egg, lemon seeds, or larger pieces of zest. It also gives the finished curd an exceptionally smooth texture.
Once strained, stir the curd gently.
It should look glossy and thick but still pourable while warm.
Step 6: Cool the Lemon Curd
Transfer the warm curd to a clean glass jar or container.
Place a piece of plastic wrap directly against the surface of the curd if you want to prevent a skin from forming.
Allow it to cool at room temperature for a short time, then refrigerate.
The curd will become noticeably thicker as it cools.
After several hours in the refrigerator, it should have a smooth, spreadable consistency.
How to Know When Lemon Curd Is Done
One of the most common mistakes is removing the curd from the heat too early.
A properly cooked curd should coat the back of a spoon. When you run your finger through the coating, the line should remain visible instead of immediately filling in.
However, do not keep cooking simply because the curd seems slightly thin while hot. Lemon curd becomes considerably thicker after refrigeration.
If you cook it too long or at too high a temperature, the eggs may curdle and the texture can become grainy.
Gentle heat and constant stirring are the most important techniques.
Tips for Perfect Lemon Curd
Use Fresh Lemons
Fresh lemons provide both juice and zest, giving the curd a vibrant citrus flavor.
For the strongest lemon flavor, use the zest because much of the aromatic citrus oil is concentrated in the peel.
Keep the Heat Low
High heat is the enemy of smooth lemon curd.
Cooking slowly gives the egg yolks time to thicken the mixture without turning into scrambled eggs.
Stir Constantly
Never leave the saucepan unattended while cooking lemon curd.
Constant stirring distributes the heat evenly and helps prevent the mixture from sticking to the bottom.
Cut the Butter Small
Small pieces of butter melt more quickly and evenly.
Adding the butter after removing the saucepan from the heat also helps create a smooth, emulsified texture.
Always Strain
Even if the curd looks perfectly smooth, straining is worthwhile. It guarantees that the finished spread is silky and removes any tiny bits of cooked egg.
How to Use Lemon Curd
There are countless ways to enjoy homemade lemon curd.
Spread it over:
- Toast
- English muffins
- Scones
- Pancakes
- Waffles
- French toast
- Biscuits
You can also use it as a filling for cakes and cupcakes.
For a quick dessert, layer lemon curd with whipped cream and fresh berries in small glasses.
Lemon curd is also delicious spooned over vanilla ice cream or yogurt.
For a beautiful tart, spread chilled lemon curd inside a pre-baked pastry shell and top it with whipped cream, fresh berries, or thin lemon slices.
Lemon Curd for Cakes
Lemon curd makes an excellent cake filling.
Allow it to become completely chilled before spreading it between cake layers. For easier assembly, pipe a ring of buttercream around the edge of the cake layer and place lemon curd inside the ring.
The buttercream border helps keep the soft curd from escaping when the next cake layer is placed on top.
Lemon curd pairs especially well with vanilla cake, sponge cake, coconut cake, blueberry cake, and white chocolate desserts.
Flavor Variations
Raspberry Lemon Curd
Serve the finished lemon curd with fresh raspberries or raspberry sauce. The sweet-tart combination is excellent for desserts.
Blueberry Lemon Dessert
Layer lemon curd with blueberries and whipped cream for an easy no-bake dessert.
Coconut Lemon Curd
Add a little toasted coconut when serving for a tropical variation.
Ginger Lemon Curd
Add a small amount of finely grated fresh ginger to the lemon mixture for a warmer citrus flavor.
Orange-Lemon Curd
Replace part of the lemon juice with freshly squeezed orange juice for a milder citrus flavor.
Storage
Store lemon curd in a clean, airtight container in the refrigerator.
For best quality, use it within approximately 1 week.
Always use clean utensils when removing curd from the container.
If you want to freeze lemon curd, place it in a freezer-safe airtight container, leaving a little space for expansion. Thaw it in the refrigerator and stir thoroughly before using.
The texture may change slightly after freezing, but gentle stirring can help restore its smooth consistency.
Common Problems
Curd is too thin: It may need additional cooking, but remember that it thickens significantly when chilled.
Curd is grainy: The eggs may have been cooked too quickly or at too high a temperature.
Curd tastes too sweet: Use fresh lemon zest and juice to provide more natural acidity and citrus flavor.
Curd tastes bitter: Too much white lemon pith may have been included with the zest.
Curd has lumps: Strain it while warm. For future batches, use lower heat and stir continuously.