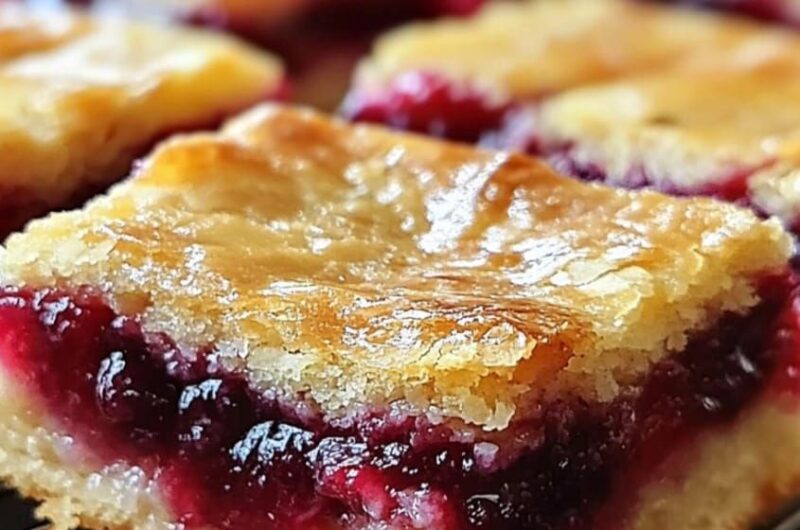
If you love classic cherry pie but want something easier to make and serve, these Cherry Pie Bars are the perfect dessert. They feature a soft, buttery crust, a sweet-tart cherry filling, and a golden crumble topping that bakes to perfection. Finished with a simple vanilla glaze, these bars are ideal for holidays, potlucks, picnics, or whenever you’re craving a fruity homemade treat.
Why You’ll Love This Recipe
- Easy to prepare with simple pantry ingredients
- No rolling out pie dough required
- Soft, buttery texture with juicy cherry filling
- Perfect for feeding a crowd
- Delicious served warm or chilled
Ingredients
For the Crust and Topping
- 1 cup (226g) unsalted butter, softened
- 2 cups granulated sugar
- 4 large eggs
- 1 teaspoon vanilla extract
- ½ teaspoon almond extract (optional, but enhances the cherry flavor)
- 3 cups all-purpose flour
- 1 teaspoon baking powder
- ½ teaspoon salt
For the Filling
- 2 cans (21 ounces each) cherry pie filling
For the Glaze
- 1 cup powdered sugar
- 2–3 tablespoons milk
- ½ teaspoon vanilla extract
Equipment
- 9×13-inch baking pan
- Electric mixer
- Mixing bowls
- Rubber spatula
- Cooling rack
- Whisk
Instructions
Step 1: Prepare the Pan
Preheat your oven to 350°F (175°C). Grease a 9×13-inch baking dish or line it with parchment paper for easier removal and cleanup.
Step 2: Make the Batter
In a large mixing bowl, beat the softened butter and granulated sugar until light and fluffy, about 3–4 minutes.
Add the eggs one at a time, mixing well after each addition. Stir in the vanilla extract and almond extract if using.
In another bowl, whisk together the flour, baking powder, and salt. Gradually add the dry ingredients to the butter mixture until fully combined. The batter will be thick and creamy.
Step 3: Form the Bottom Crust
Spread about three cups of the batter evenly into the prepared baking pan using a spatula. Smooth the surface as evenly as possible.
Step 4: Add the Cherry Filling
Spoon the cherry pie filling evenly over the crust. Spread it gently to cover the entire surface while keeping an even layer.
Step 5: Add the Top Layer
Drop spoonfuls of the remaining batter over the cherry filling. Don’t worry if the filling shows through; the batter spreads as it bakes and creates a rustic appearance.
Step 6: Bake
Bake for 35–40 minutes, or until the top is lightly golden brown and a toothpick inserted into the cake portions comes out clean.
If the top browns too quickly, loosely cover the pan with aluminum foil during the final 10 minutes of baking.
Step 7: Cool Completely
Remove the bars from the oven and place the pan on a cooling rack. Allow them to cool completely before glazing. This prevents the glaze from melting into the bars.
Step 8: Prepare the Glaze
Whisk together the powdered sugar, milk, and vanilla extract until smooth. Add more milk if needed to achieve a pourable consistency.
Drizzle the glaze over the cooled bars using a spoon or piping bag.
Step 9: Slice and Serve
Once the glaze has set, cut into squares or rectangles. Serve at room temperature or chilled.
Tips for Success
- Use room-temperature butter for a smoother batter.
- Almond extract pairs beautifully with cherries, but you can omit it if preferred.
- Let the bars cool completely before cutting for cleaner slices.
- Line the baking pan with parchment paper to lift the bars out easily.
- Chill the bars for 30 minutes before slicing if you want extra neat edges.
Variations
Homemade Cherry Filling
Instead of canned filling, cook together:
- 4 cups pitted cherries
- ¾ cup sugar
- 2 tablespoons cornstarch
- 2 tablespoons lemon juice
- ¼ cup water
Simmer until thickened, then cool before using.
Mixed Berry Bars
Replace the cherry filling with blueberry, raspberry, or mixed berry pie filling for a delicious twist.
Chocolate Cherry Bars
Sprinkle ½ cup mini chocolate chips over the cherry filling before adding the top batter.
Nutty Version
Top the batter with sliced almonds or chopped pecans before baking for added crunch.
Storage
Store Cherry Pie Bars in an airtight container at room temperature for up to 2 days, or refrigerate for 5 days. The flavor becomes even better after chilling overnight.
Freezing
These bars freeze beautifully. Wrap individual squares tightly in plastic wrap and place them in a freezer-safe container or bag. Freeze for up to 3 months. Thaw overnight in the refrigerator before serving.
Serving Suggestions
Cherry Pie Bars are delicious on their own, but they’re even better served with:
- Vanilla ice cream
- Fresh whipped cream
- Hot coffee
- Tea
- A dusting of powdered sugar
- Fresh cherries for garnish
Frequently Asked Questions
Can I use fresh cherries?
Yes. Simply prepare a homemade cherry filling by cooking fresh cherries with sugar and cornstarch until thick.
Can I make these ahead of time?
Absolutely. These bars are an excellent make-ahead dessert because the flavors improve after resting overnight.
Can I use other pie fillings?
Yes. Apple, blueberry, peach, raspberry, and strawberry pie fillings all work wonderfully.
Do the bars need refrigeration?
If serving within a day or two, room temperature is fine. For longer storage, refrigerate them.