Introduction
If you love creamy cheesecake and rich salted caramel, these No-Bake Salted Caramel Cheesecake Cups are the perfect dessert. They combine a buttery cookie crumb base with a smooth, fluffy cheesecake layer and generous swirls of sweet-and-salty caramel. Because there is no oven involved, these individual desserts are incredibly easy to make and ideal for entertaining.
The individual cups also make serving simple. There is no need to slice a cheesecake, worry about uneven portions, or transfer delicate pieces to plates. Simply prepare the cups, chill them, add the toppings, and serve straight from the refrigerator.
These cheesecake cups are wonderful for dinner parties, birthdays, holidays, potlucks, afternoon gatherings, or whenever you want an impressive dessert without spending hours in the kitchen.
Ingredients
For the Cookie Crust
- 20 chocolate or digestive-style cookies
- 4 tablespoons unsalted butter, melted
- 1 tablespoon granulated sugar, optional
- Pinch of salt
For the Cheesecake Filling
- 8 ounces cream cheese, softened
- 1/2 cup powdered sugar
- 1 teaspoon vanilla extract
- 1 cup heavy whipping cream, cold
- 2 tablespoons powdered sugar
- 1/3 cup salted caramel sauce
- Pinch of salt
For the Salted Caramel Topping
- 1/2 cup caramel sauce
- 1/4 teaspoon flaky sea salt
For Garnishing
- Whipped cream
- Extra salted caramel sauce
- Flaky sea salt
- Cookie crumbs
- Small pieces of caramel candy, optional
Equipment
You will need a food processor or rolling pin, mixing bowls, an electric hand mixer or stand mixer, a spatula, spoons, and approximately 8 small dessert cups or glasses.
Clear cups are especially recommended because they allow the beautiful layers to remain visible.
Step 1: Prepare the Cookie Crust
Place the cookies in a food processor and pulse until they become fine crumbs. If you do not have a food processor, place the cookies inside a resealable plastic bag and crush them with a rolling pin until finely ground.
Transfer the crumbs to a bowl. Add the melted butter, optional granulated sugar, and a small pinch of salt. Stir until the mixture resembles wet sand and all the crumbs are evenly coated with butter.
Divide the mixture between your dessert cups. Depending on the size of the cups, use approximately 2 tablespoons of crumbs for each serving.
Press the crumbs gently into the bottom using the back of a spoon. You want the crust compact enough to hold together but not packed so tightly that it becomes difficult to scoop.
Place the cups in the refrigerator while you prepare the cheesecake filling.
Step 2: Prepare the Cream Cheese Mixture
Place the softened cream cheese in a large mixing bowl. Beat it with an electric mixer until completely smooth and creamy.
Add 1/2 cup powdered sugar and vanilla extract. Continue mixing until the sugar is fully incorporated and the mixture is silky.
Scrape down the sides of the bowl as needed. Any lumps in the cream cheese will be difficult to remove later, so make sure the mixture is smooth before proceeding.
Add 1/3 cup salted caramel sauce and a small pinch of salt. Beat briefly until the caramel is evenly incorporated.
Taste the mixture. If you prefer a stronger caramel flavor, you can add another tablespoon or two of caramel sauce.
Step 3: Whip the Cream
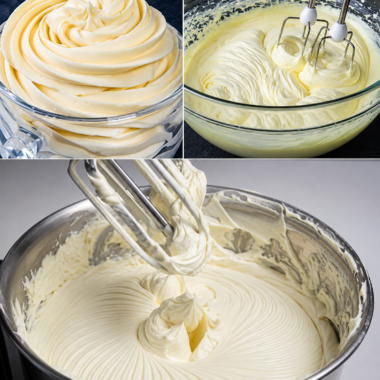
Pour the cold heavy whipping cream into a separate bowl. Using clean beaters, whip the cream until it begins to thicken.
Add 2 tablespoons powdered sugar and continue beating until medium-to-stiff peaks form.
The cream should hold its shape when the beaters are lifted. Avoid overmixing, as whipping cream for too long can become grainy and eventually turn into butter.
Step 4: Combine the Cheesecake Filling
Add approximately half of the whipped cream to the cream cheese mixture. Using a spatula, gently fold it into the cream cheese.
Once incorporated, add the remaining whipped cream and continue folding until the mixture is light, fluffy, and uniform.
Do not vigorously stir the mixture. Folding rather than beating preserves the air that gives these no-bake cheesecake cups their soft, mousse-like texture.
The finished filling should be thick enough to spoon or pipe into the dessert cups.
Step 5: Assemble the Cheesecake Cups
Remove the chilled cookie crusts from the refrigerator.
Spoon the cheesecake filling evenly over the crust. For a cleaner presentation, place the filling into a piping bag or large resealable bag with one corner snipped off. Pipe the filling into each cup in a circular motion.
Leave a little space at the top of each cup for the caramel topping and whipped cream.
After filling the cups, gently tap them against the counter once to settle the cheesecake layer. Do not press down because you want to maintain its fluffy consistency.
Step 6: Add the Salted Caramel
Warm the caramel sauce very gently if it is too thick to drizzle. It should be fluid enough to pour but not hot.
Drizzle approximately 1 tablespoon of caramel sauce over each cheesecake cup.
For a beautiful layered effect, you can also spoon a small amount of caramel into the center of each cheesecake layer before adding the final topping.
Finish the caramel with a tiny sprinkle of flaky sea salt. The salt is important because it balances the sweetness of the caramel and gives the dessert its distinctive salted-caramel flavor.
Step 7: Chill
Cover the dessert cups loosely with plastic wrap or place them in a covered container.
Refrigerate for at least 4 hours, although overnight chilling is even better.
The chilling time allows the cheesecake filling to firm up and the flavors to blend. Because this is a no-bake dessert, adequate refrigeration is important for achieving the right texture.
Avoid leaving the cheesecake cups at room temperature for long periods, especially during warm weather.
Step 8: Garnish and Serve
Just before serving, add a small swirl of whipped cream to each cup.
Drizzle with additional salted caramel sauce and sprinkle with a few flakes of sea salt.
For extra texture, add crushed cookie crumbs or small pieces of caramel candy. A tiny pinch of flaky salt on top provides an attractive finish and enhances the flavor.
Serve the cups cold, straight from the refrigerator.
Helpful Tips
Soften the cream cheese: Softened cream cheese blends much more easily and helps create a smooth filling. Let it sit at room temperature for about 30 minutes before beginning.
Use cold whipping cream: Heavy cream whips best when it is thoroughly chilled. For an even better result, chill the mixing bowl and beaters beforehand.
Do not overmix: Once the whipped cream is added, fold gently to keep the filling light and airy.
Use quality caramel: Since caramel is one of the main flavors, a good-quality caramel sauce makes a noticeable difference.
Balance the sweetness: The flaky sea salt is not merely decoration. It helps cut through the sweetness of the caramel and cheesecake.
Make them ahead: These cups are excellent for entertaining because they can be assembled the day before and kept refrigerated until serving.
Variations
For a chocolate version, use chocolate sandwich cookies for the crust and add a teaspoon of cocoa powder to the cheesecake filling.
For a classic cheesecake crust, replace the chocolate cookies with graham crackers or digestive biscuits.
You can also add a thin layer of chopped pecans between the cookie crust and cheesecake filling. The toasted nuts provide a delicious crunchy contrast to the creamy layers.
For extra caramel flavor, fold a few tablespoons of finely chopped soft caramel candies into the cheesecake mixture.
If you prefer a more sophisticated dessert, use dark chocolate cookie crumbs and bittersweet caramel sauce. The slightly bitter chocolate creates an excellent contrast with the sweet caramel.
Storage
Store the cheesecake cups covered in the refrigerator for up to 3 days. Add whipped cream and decorative toppings shortly before serving for the freshest appearance.
Because these desserts contain cream cheese and whipped cream, they should remain refrigerated until ready to eat.