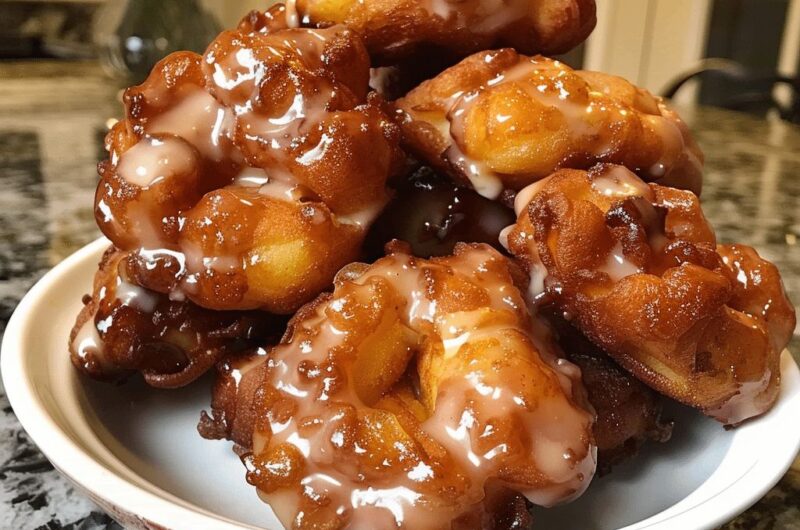
These Baked Apple Fritters are a delicious lighter alternative to traditional deep-fried fritters. They have tender pieces of cinnamon-spiced apple throughout a soft, cake-like dough, with lightly crisp golden edges and a sweet vanilla glaze drizzled over the top.
Unlike fried fritters, these are baked in the oven, making them easy to prepare without a pot of hot oil. They’re wonderful for breakfast, brunch, an afternoon snack, or a cozy dessert served with a cup of coffee or tea.
For the best flavor, use firm, sweet-tart apples that hold their shape during baking. Granny Smith, Honeycrisp, Pink Lady, or Braeburn apples all work beautifully.
Ingredients
For the Apple Fritters
- 2 medium apples, peeled, cored, and finely diced
- 2 cups all-purpose flour
- ½ cup granulated sugar
- 2 teaspoons baking powder
- 1 teaspoon ground cinnamon
- ¼ teaspoon ground nutmeg
- ½ teaspoon salt
- 2 large eggs
- ½ cup whole milk
- 4 tablespoons unsalted butter, melted and slightly cooled
- 1 teaspoon vanilla extract
- 1 tablespoon lemon juice
For the Apple Filling
- 1 tablespoon unsalted butter
- 1 tablespoon brown sugar
- ½ teaspoon ground cinnamon
- ¼ teaspoon nutmeg
For the Glaze
- 1½ cups powdered sugar
- 2–3 tablespoons milk
- ½ teaspoon vanilla extract
- Pinch of salt
Instructions
1. Prepare the Apples
Peel, core, and finely dice the apples. Keep the pieces relatively small so they become tender inside the fritters without making the dough difficult to shape.
Place the diced apples in a bowl and toss them with the lemon juice. The lemon adds a pleasant brightness and helps prevent the apples from browning.
eat a skillet over medium heat and add 1 tablespoon of butter. Once melted, add the apples, brown sugar, cinnamon, and nutmeg.
Cook for approximately 4–5 minutes, stirring occasionally, until the apples begin to soften and become fragrant. You don’t want them completely mushy.
Remove the skillet from the heat and allow the apples to cool for several minutes.
Prepare the Oven
Preheat your oven to 375°F (190°C).
Line a large baking sheet with parchment paper. Lightly grease the parchment with cooking spray or a small amount of butter.
The parchment will prevent the fritters from sticking while making cleanup much easier.
3. Mix the Dry Ingredients
In a large bowl, whisk together the flour, granulated sugar, baking powder, cinnamon, nutmeg, and salt.
Mixing the dry ingredients first ensures that the baking powder and spices are evenly distributed throughout the dough.
Mix the Wet Ingredients
In a separate bowl, whisk together the eggs, milk, melted butter, and vanilla extract.
Make sure the melted butter has cooled slightly before adding it to the eggs. Very hot butter can partially cook the eggs.
Pour the wet ingredients into the bowl with the dry ingredients.
Stir gently with a wooden spoon or rubber spatula until the ingredients are just combined.
Do not overmix. A few small lumps are perfectly fine. Overmixing can make the fritters dense instead of soft and tender.
5. Fold in the Apples
Once the cooked apples have cooled, gently fold them into the batter.
The finished batter should be thick and scoopable. If it seems unusually wet, allow it to rest for 3–5 minutes so the flour can absorb some of the moisture.
If your apples released a lot of liquid while cooking, avoid adding that excess liquid to the batter.
6. Shape the Fritters
Use a large spoon, cookie scoop, or ice cream scoop to portion the batter onto the prepared baking sheet.
Make approximately 10–12 fritters, leaving at least 2 inches of space between each one.
Gently flatten the tops with the back of a spoon. Baked fritters don’t spread as dramatically as fried fritters, so shaping them slightly flatter helps them develop an attractive fritter-like appearance.
7. Bake
Place the baking sheet in the preheated oven and bake for approximately 15–20 minutes.
The fritters should be puffed and golden around the edges. Insert a toothpick into the center of one fritter; it should come out clean or with a few moist crumbs.
For slightly more golden tops, brush the fritters lightly with melted butter during the final few minutes of baking.
Remove them from the oven and allow them to cool on the baking sheet for approximately 5 minutes before transferring them to a wire rack.
8. Make the Glaze
While the fritters cool, prepare the glaze.
Add the powdered sugar to a small bowl. Whisk in 2 tablespoons of milk and the vanilla extract.
Add a pinch of salt and mix until smooth.
If the glaze is too thick, add another teaspoon of milk at a time. If it’s too thin, add a little more powdered sugar.
You want the glaze to be thick enough to coat the fritters but fluid enough to drizzle.
9. Glaze the Fritters
Dip the tops of the slightly warm fritters into the glaze, or drizzle the glaze generously over them using a spoon.
Allow the glaze to sit for a few minutes and set slightly before serving.
For an extra-special presentation, sprinkle the glazed fritters with chopped pecans, walnuts, or a tiny dusting of cinnamon.
Serving Suggestions
These baked apple fritters taste best when served warm or at room temperature. Pair them with a cup of coffee, tea, hot chocolate, or a glass of cold milk.
For dessert, serve a warm fritter with a scoop of vanilla ice cream or a spoonful of whipped cream. You can also drizzle them with caramel sauce for an extra indulgent treat.
Storage
Store leftover fritters in an airtight container at room temperature for up to 2 days or refrigerate them for up to 4 days. Because the glaze can soften over time, they are best enjoyed fresh.
To warm them, place a fritter in the microwave for about 10–15 seconds or heat them briefly in a low oven.
These Baked Apple Fritters are an easy way to enjoy the classic flavors of apple fritters without the need for deep-frying. With tender apples, warm cinnamon and nutmeg, and a sweet vanilla glaze, they make a comforting homemade treat that the whole family will love.